| WIP
|
This article is a work-in-progress or created as a placeholder for testing purposes. This article is subject to change and/or expansion. It may be incomplete, inaccurate, or stop abruptly.
This tag will be removed upon draft completion.
|
Add Permission Sets to Grooper 2023
In this article we will show you how to add and update permission sets to access different areas of a repository in Grooper 2023.
About
There may be times where you do not want everyone to have full access to your Grooper repository. After putting in hours of work into customizing your repository design for your company needs, you do not necessarily want someone without training being able to edit your work.
You may have some employees that design the repository and you may have others that simply review the extracted data. Each employee that works with Grooper may have different needs and require different restrictions. With permission sets you can customize who has access to which part of the repository you are working on.
Adding Permission Sets
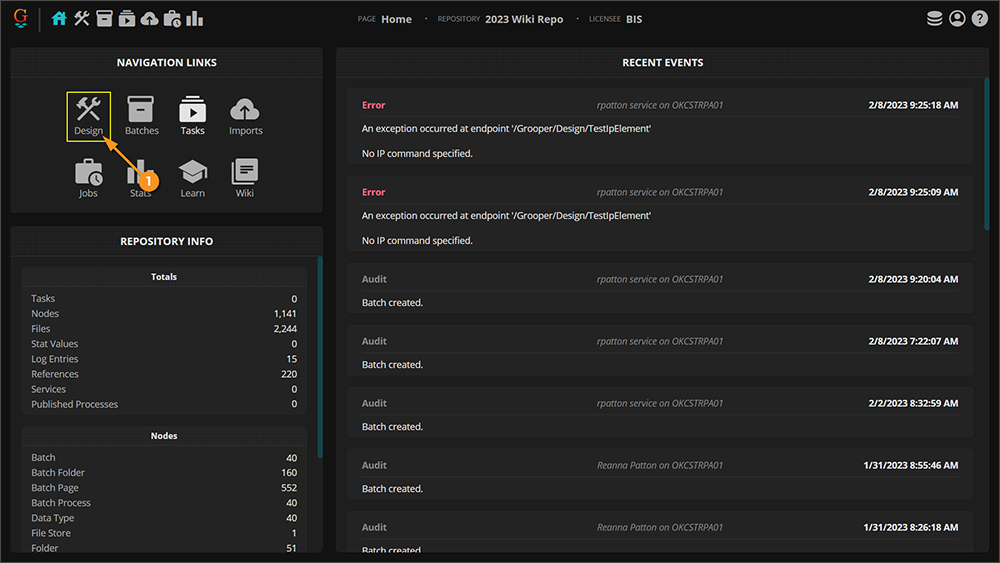
- Open Grooper and click on the "Design" icon.
|
|
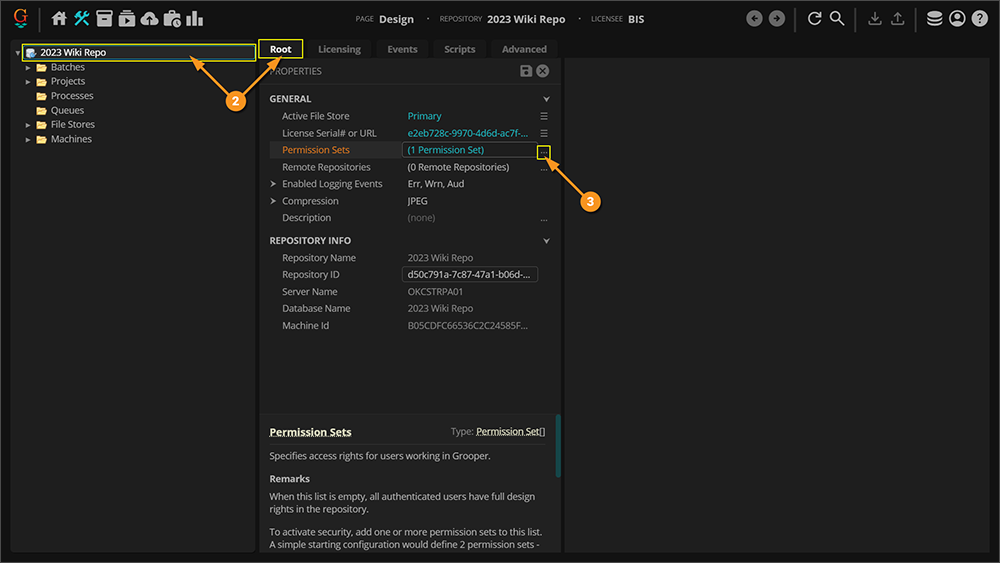
- Make sure the repository root node is selected and click on the "Root" tab if not already selected.
- Click the ellipsis button at the end of the Permission Sets property.
|
|
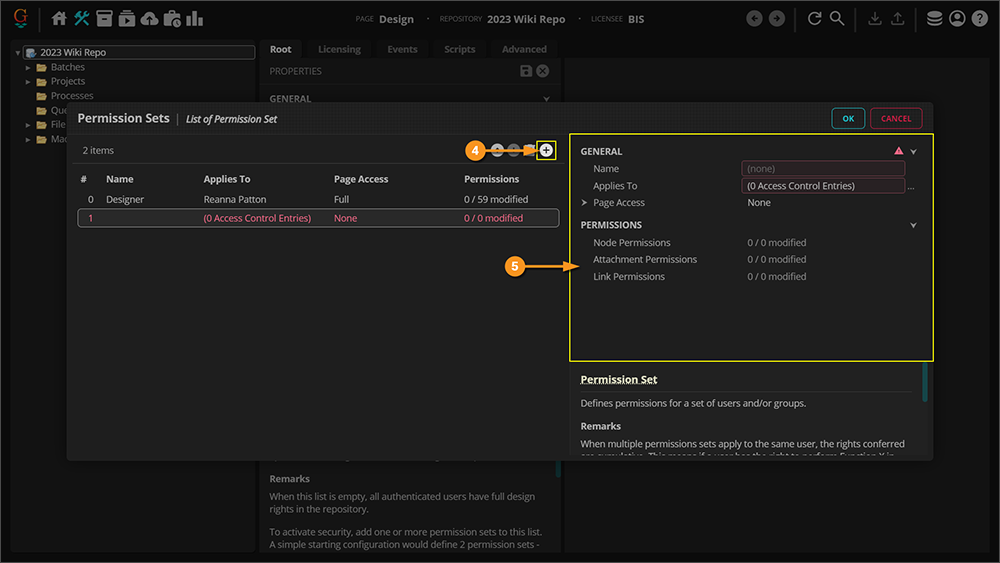
- Once the Permission Sets window opens, click the plus sign button in the top righthand corner to add a new permission set.
- On the right side of the window, you will have a set of options to choose from.
|
|
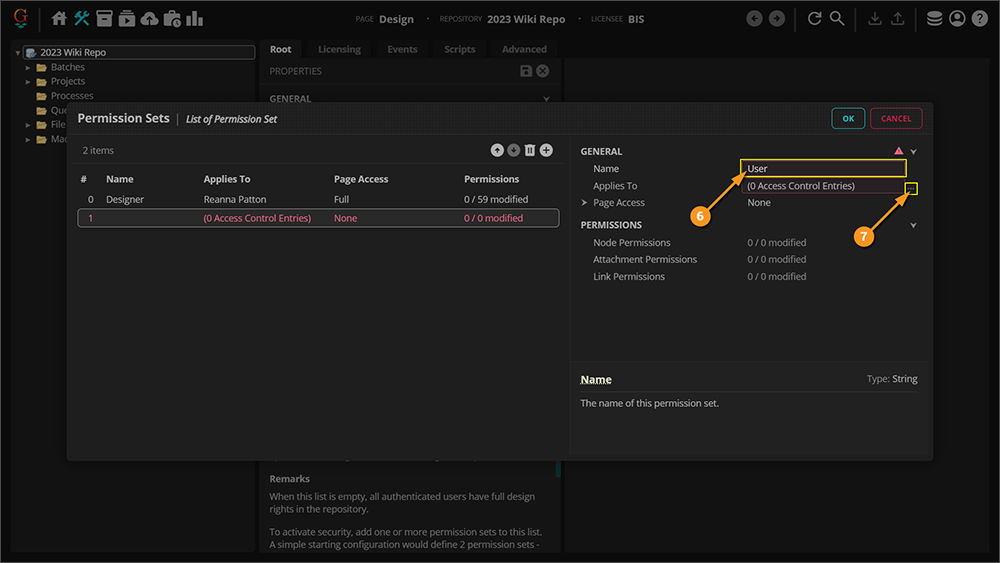
- To the right of Name enter the name you wish to give to this permission set. In this example we are going to use the name "Reviewer".
- Click the ellipsis button to the right of the Applies To property.
|
|
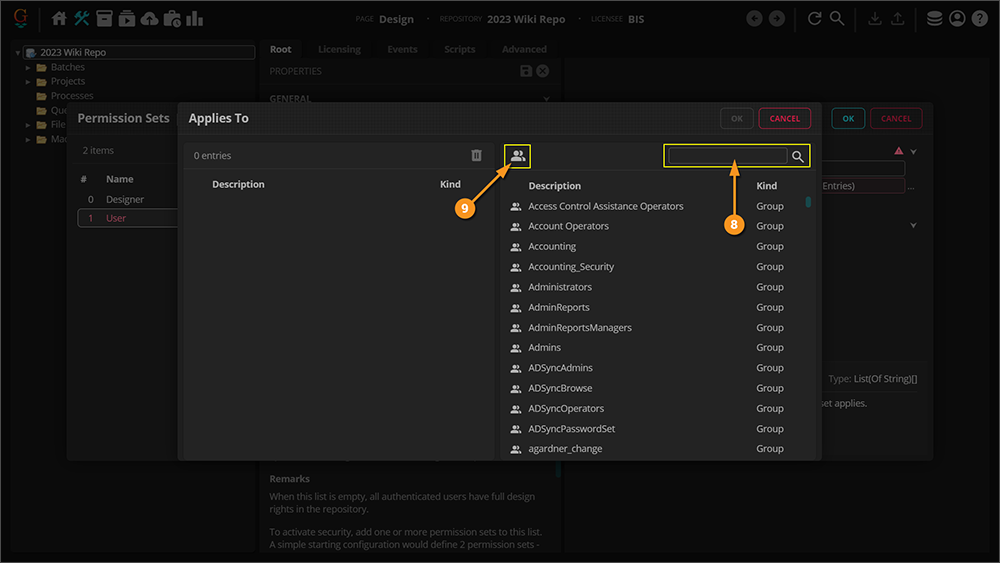
- In the window that pops up, search for the group you wish this permission set to apply to.
- If you want to assign Permission Sets to individual people, first click the person icon above "Description" to switch to a list of individuals rather than groups.
|
|
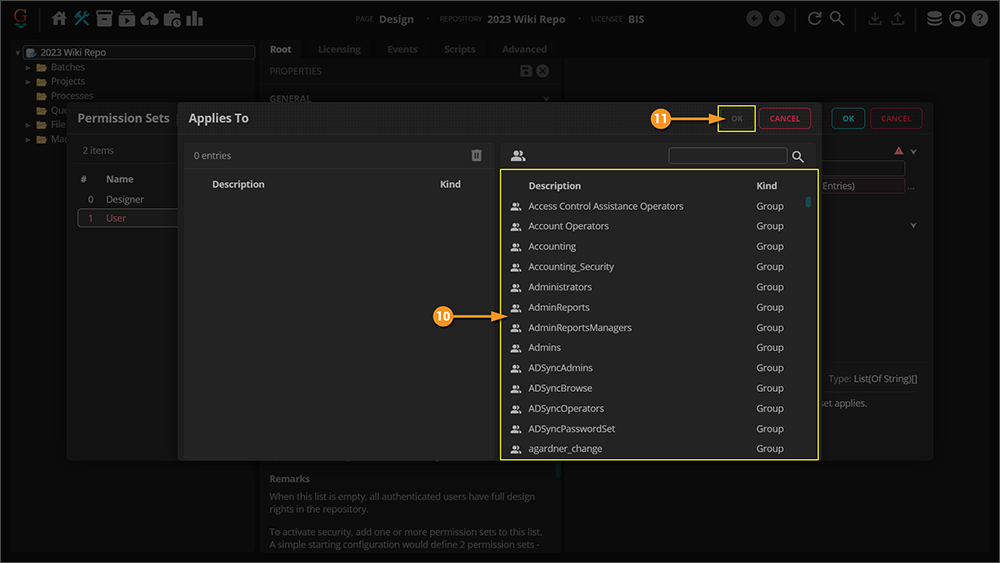
- Double click the group or individual you want to assign to the permission set. You can add multiple at one time.
- Click "OK".
|
|
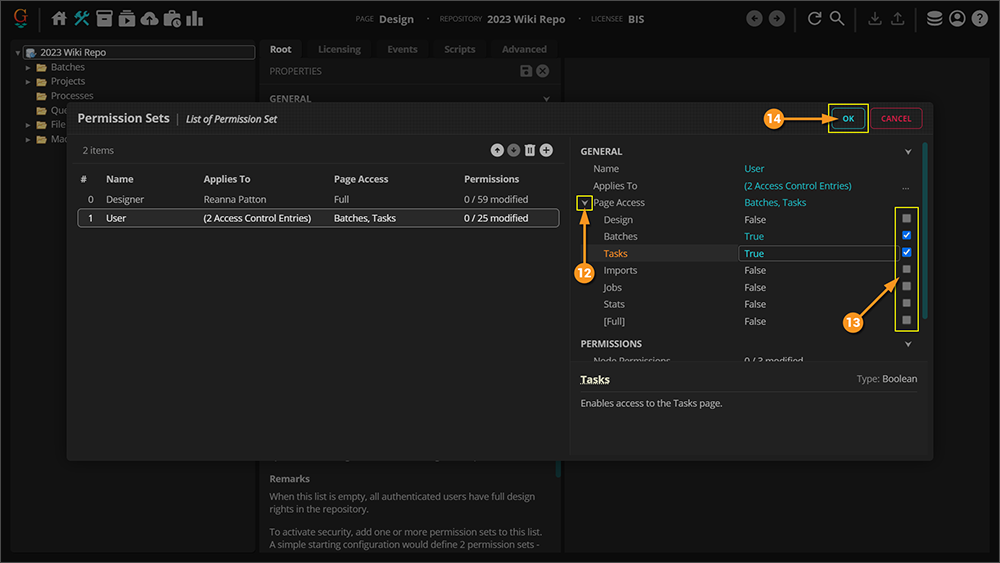
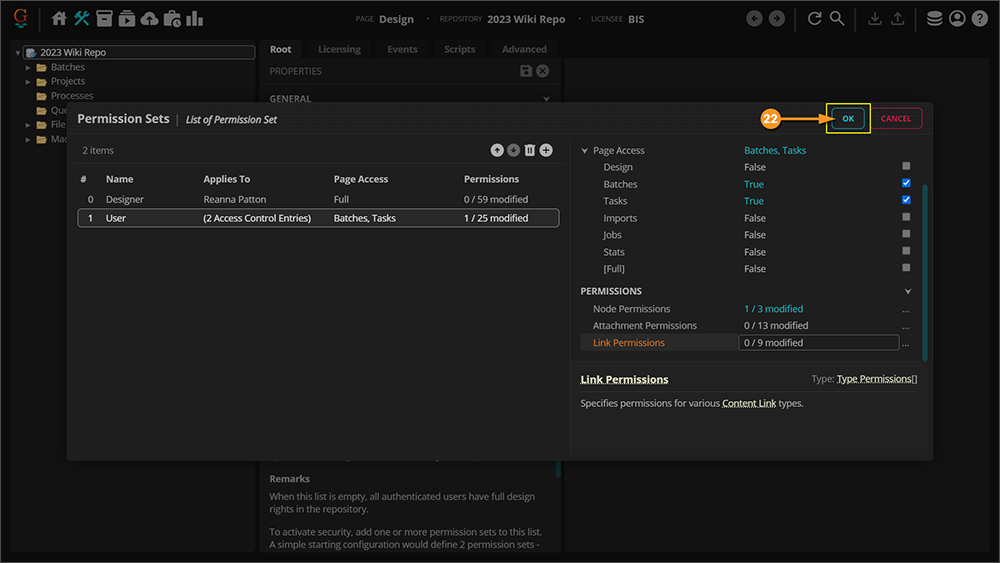
- On the Permission Sets window, click the arrow to the left of the Page Access property to open up another set of properties.
- Add a check mark next to each item you wish the groups or individuals to have access to.
- Click "OK".
|
|
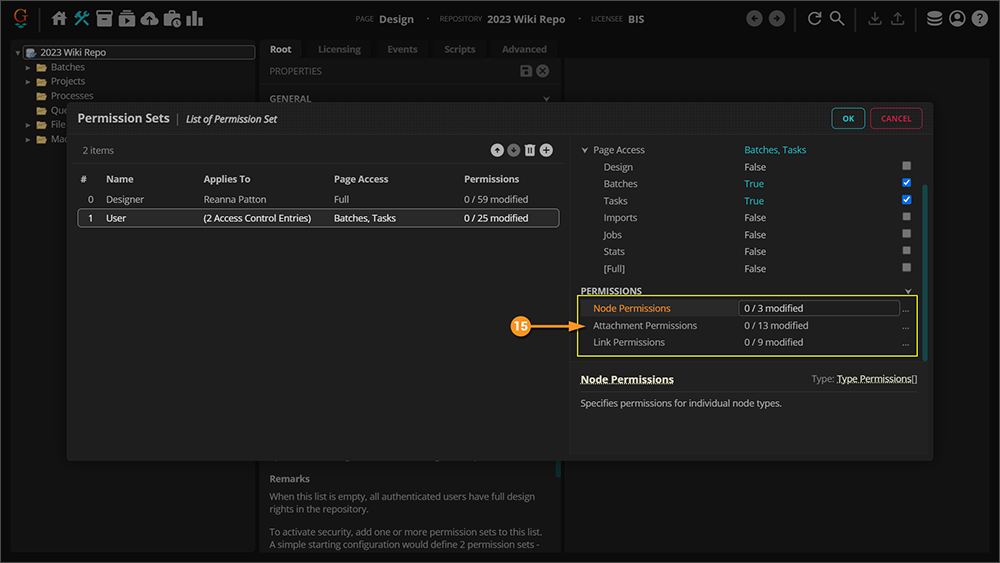
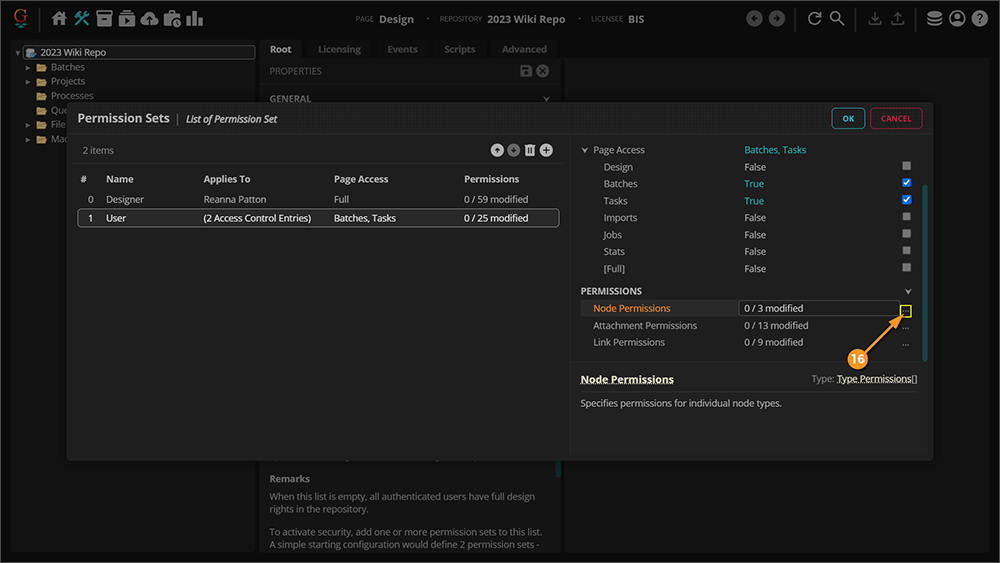
- At the bottom of the properties list on the right, there are three sets of permissions you can apply to the selected Permission Set:
- Node Permissions
- Attachment Permissions
- Link Permissions
|
|
- Click on the ellipsis button to the right of the property. For this example we are going to configure the Node Permissions.
|
|
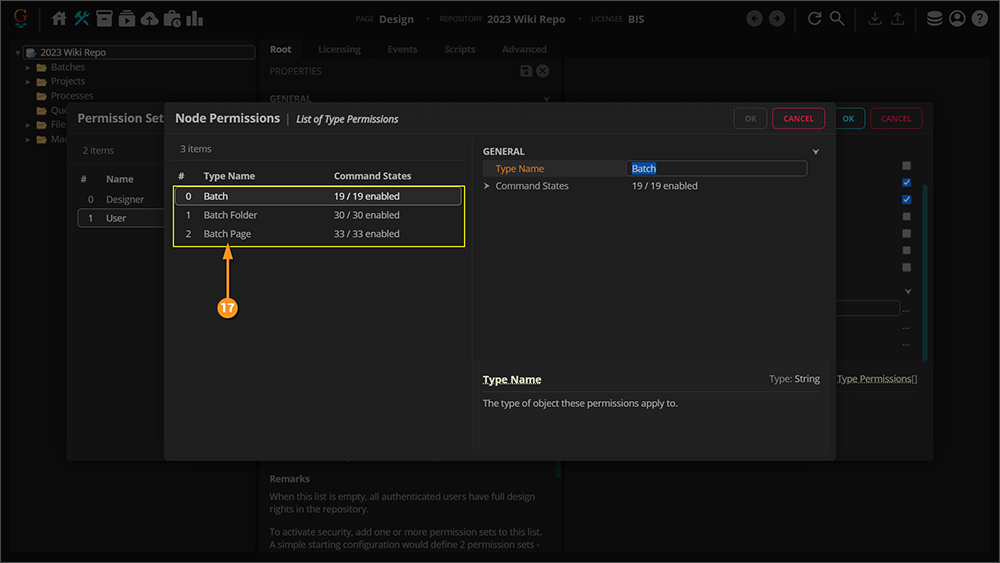
- In the window that pops up, you will see multiple options. Here we have three: Batch, Batch Folder, and Batch Page.
|
|
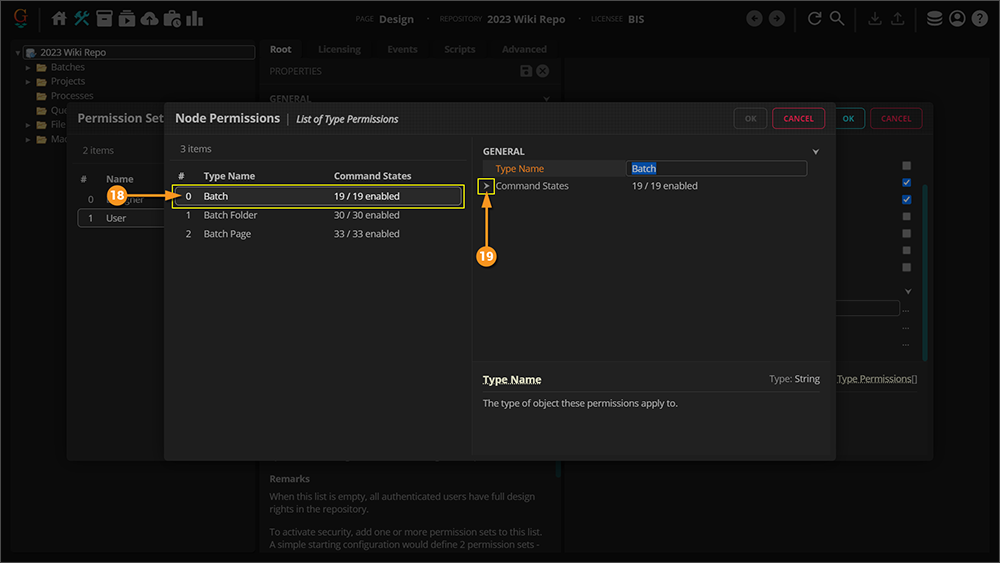
- Select the type of permissions you wish to configure. In this example we are going to select Batch.
- On the right side of the window, click the arrow next to Command States to open the list of different individual permissions you can set.
- By default, all of the permissions are selected. If you wish to restrict permission to perform a specific action, just uncheck the box next to the action.
|
|
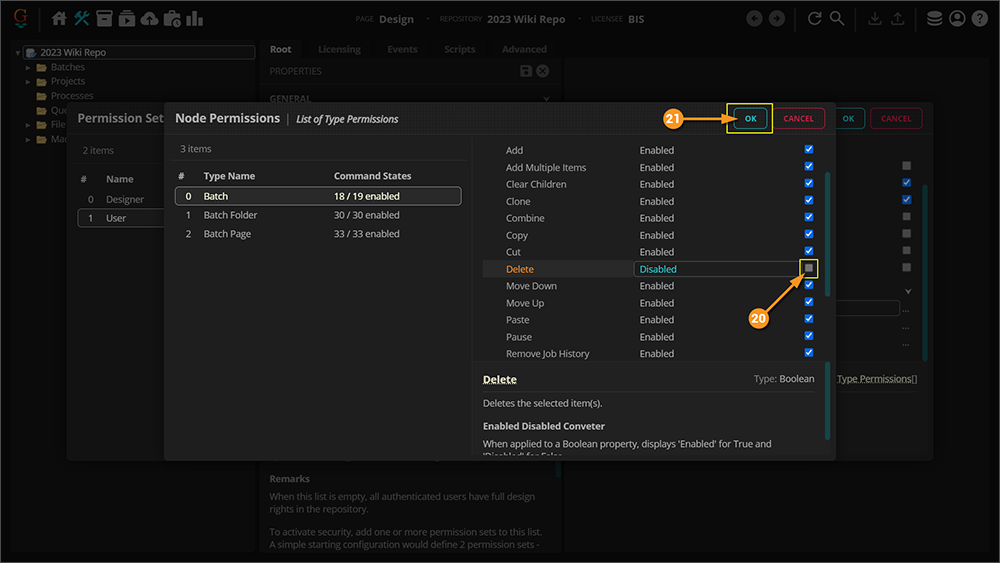
- In this example, we are going to prevent anyone with the User permission set from deleting batches. Scroll through the 'Command States until you find the "Delete" command and uncheck the box to the right of the command.
- Click "OK" to save your work and close the window.
|
|
- Click "OK" to close the Permission Sets window.
|
|
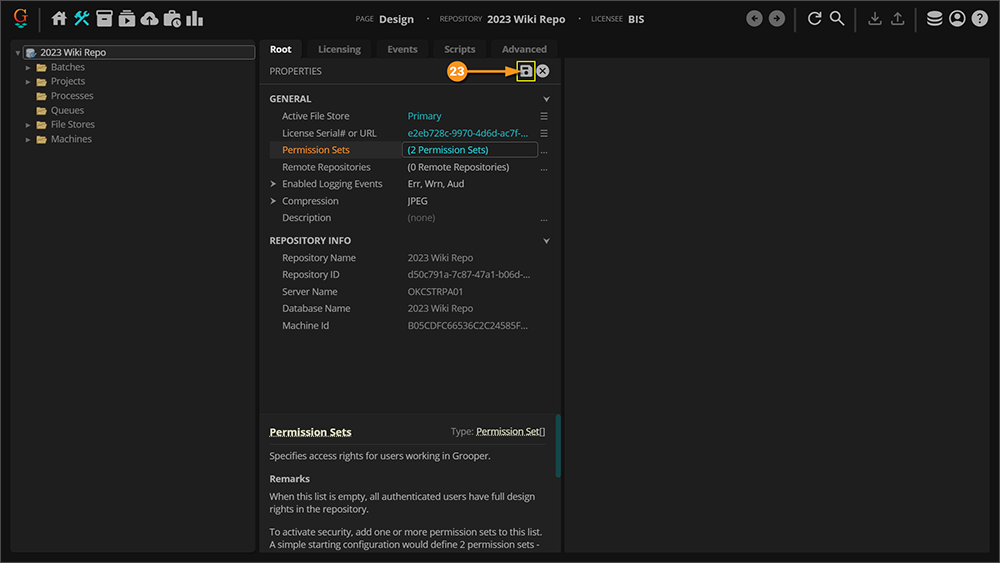
- Click the save icon to save the configured Permission Sets.
|
|


